-25%
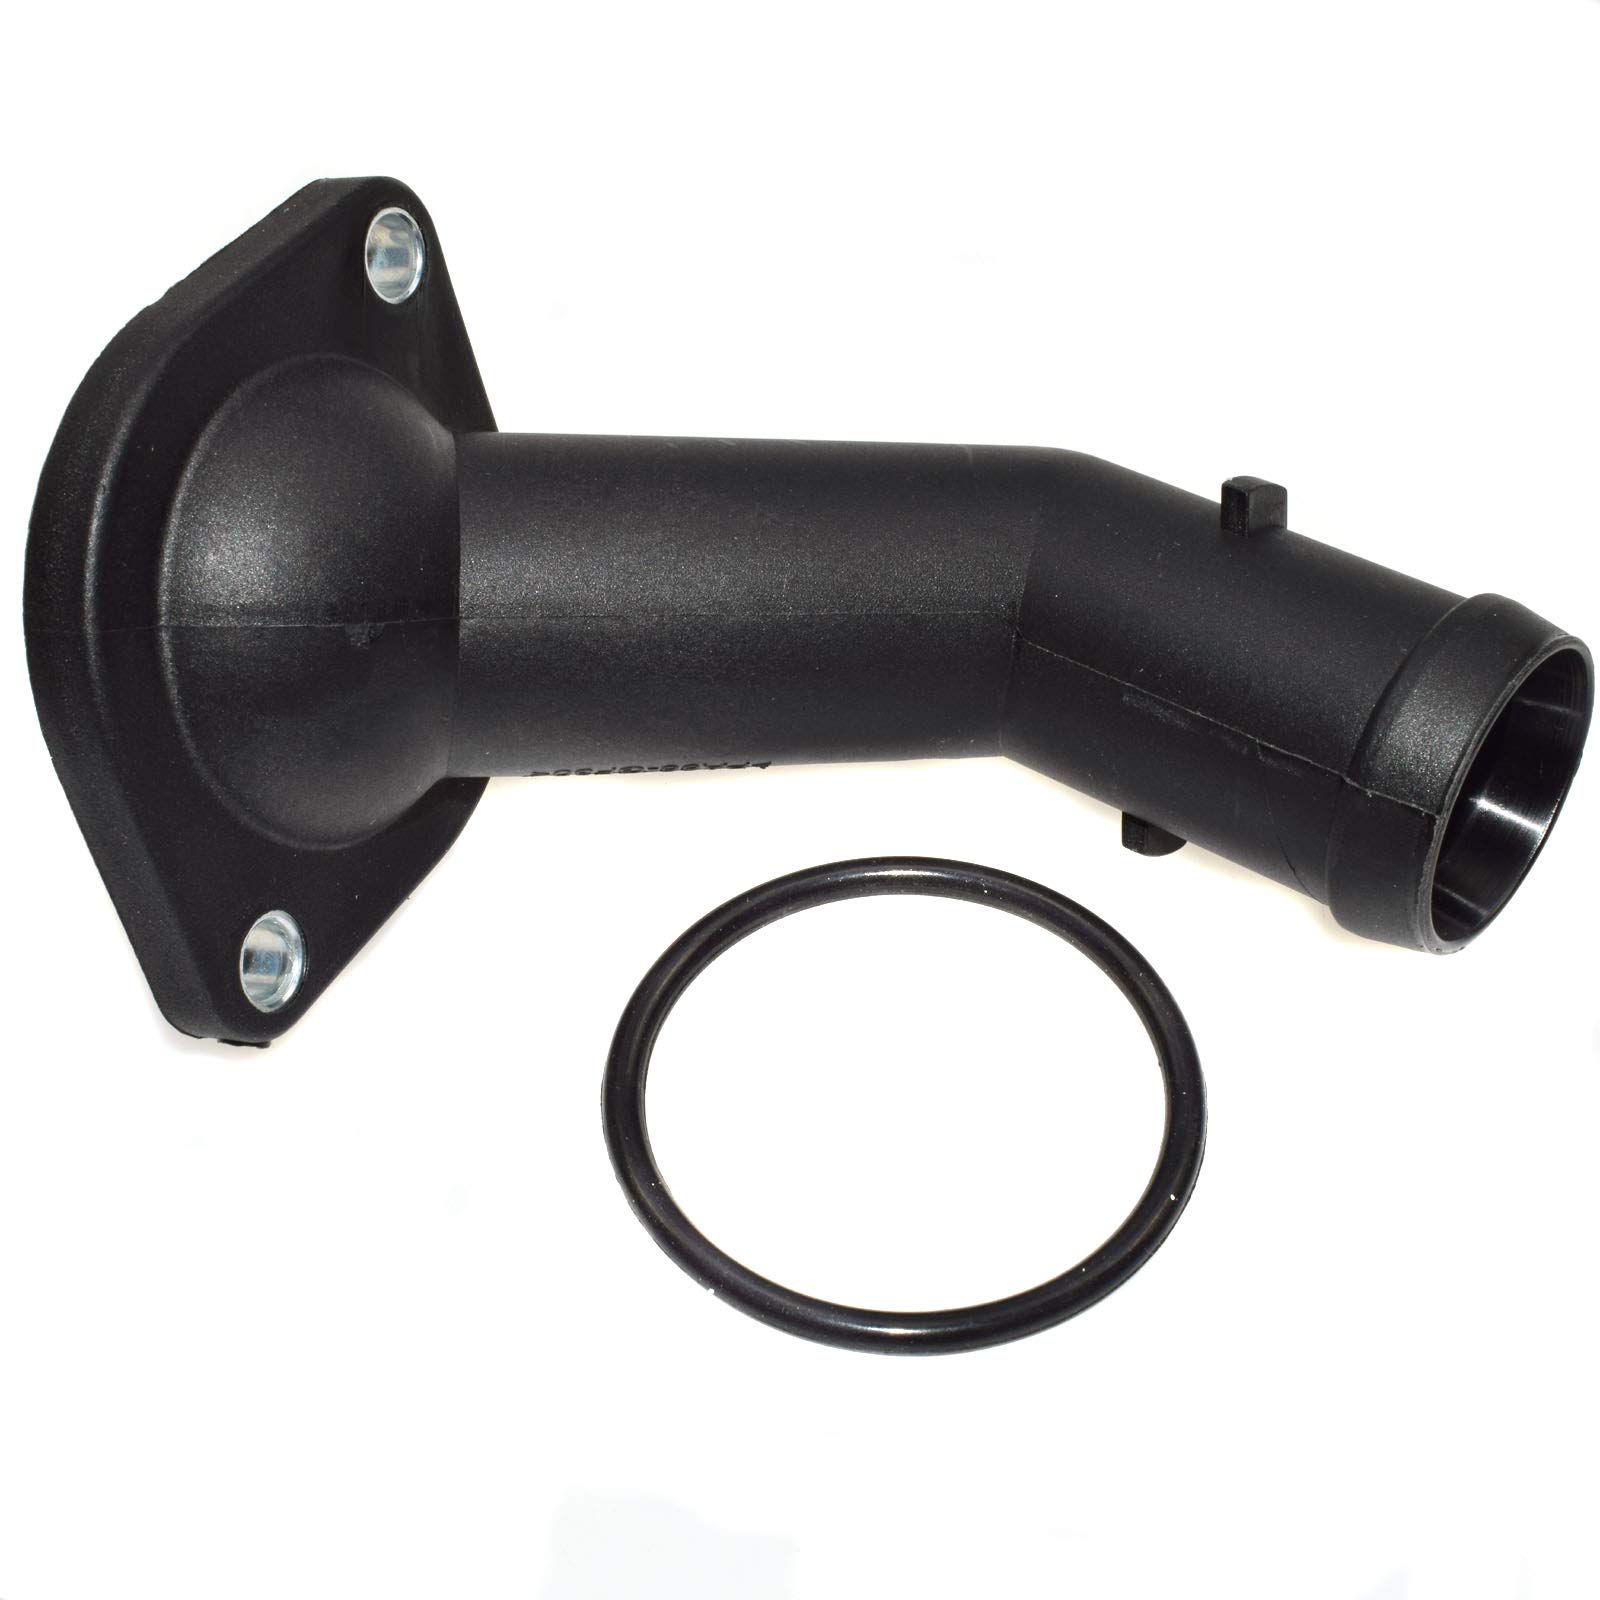
Get Engine Coolant Thermostat Housing VW 337/20AE-1.8T / Golf IV-1.8T/2.0T / Jetta IV-1.8T/2.0 / Jetta IV GLI 1.8T / New Beetle-1.8T 06A121121C
The engine coolant thermostat housing is a crucial component in the engine’s cooling system, responsible for housing the thermostat and directing coolant flow. This guide provides a comprehensive overview of the thermostat housing’s function, construction, types, symptoms of issues, diagnosis, and replacement.
What is the Engine Coolant Thermostat Housing?
The engine coolant thermostat housing is a metal or plastic component that encloses the thermostat within the engine’s cooling system. It connects the engine’s thermostat to the radiator and coolant passages, directing the flow of coolant between the engine and radiator. The thermostat housing ensures that coolant flows efficiently through the engine and radiator to maintain optimal engine temperature.
Functions of the Engine Coolant Thermostat Housing
The thermostat housing serves several essential functions in the cooling system:
- Housing the Thermostat: The primary function of the thermostat housing is to encase the thermostat, a valve that regulates coolant flow based on engine temperature. The thermostat controls the flow of coolant from the engine to the radiator, ensuring the engine reaches and maintains its optimal operating temperature.
- Directing Coolant Flow: The thermostat housing directs coolant flow between the engine and radiator. It ensures that coolant circulates properly through the engine and radiator, preventing overheating and maintaining efficient engine performance.
- Preventing Leaks: The thermostat housing provides a secure enclosure for the thermostat and coolant passages. It features gaskets or seals to prevent coolant leaks, which could lead to engine overheating or damage.
- Connecting Coolant Hoses: The thermostat housing typically includes connections for coolant hoses, which transport coolant to and from the radiator and engine. These connections ensure proper coolant flow and pressure within the cooling system.
- Temperature Regulation: By housing the thermostat, the thermostat housing plays a role in regulating engine temperature. The thermostat opens and closes based on temperature, allowing coolant to flow through the radiator when the engine reaches a certain temperature.
Construction of the Engine Coolant Thermostat Housing
The thermostat housing is constructed from durable materials designed to withstand the high temperatures and pressures of the engine’s cooling system. Key components include:
- Housing Body: The housing body is the main component of the thermostat housing, providing the structure that encloses the thermostat and directs coolant flow. It is typically made from metal (such as aluminum or cast iron) or high-quality plastic.
- Thermostat Chamber: The thermostat chamber is a cavity within the housing that holds the thermostat. It is designed to ensure that the thermostat functions correctly and regulates coolant flow effectively.
- Coolant Hose Connectors: The housing features connectors for coolant hoses that link the thermostat housing to the engine and radiator. These connectors ensure that coolant flows properly through the cooling system.
- Gasket or Seal: The thermostat housing is equipped with a gasket or seal to prevent coolant leaks. This gasket is typically made from rubber or silicone and provides a tight seal between the housing and the engine.
- Mounting Bolts: The housing is secured to the engine with mounting bolts. These bolts ensure that the housing remains firmly in place and maintains a proper seal.
Types of Engine Coolant Thermostat Housings
Engine coolant thermostat housings come in various designs and materials based on their application:
- Metal Thermostat Housings: Metal thermostat housings, typically made from aluminum or cast iron, are common in many engines due to their durability and resistance to high temperatures. Metal housings are less likely to deform or crack under extreme conditions.
- Plastic Thermostat Housings: Plastic thermostat housings are often used in modern engines to reduce weight and cost. They are typically made from high-quality, heat-resistant plastics and are designed to withstand the engine’s cooling system pressures.
- Integrated Thermostat Housings: Some engines feature integrated thermostat housings that combine the thermostat housing with other engine components, such as the water pump or intake manifold. Integrated designs can simplify engine construction and reduce the number of components.
- Adjustable Thermostat Housings: In some engines, the thermostat housing includes adjustable features that allow for fine-tuning of coolant flow or temperature settings. These adjustable housings provide additional control over engine temperature regulation.
Symptoms of Issues with the Engine Coolant Thermostat Housing
Problems with the engine coolant thermostat housing can lead to various issues affecting engine performance and cooling system efficiency. Common symptoms of issues with the thermostat housing include:
- Coolant Leaks: One of the most noticeable signs of a problem with the thermostat housing is coolant leakage. You may observe coolant pooling around the housing or dripping from the engine. Leaks can be caused by a damaged housing, faulty gasket, or loose connections.
- Engine Overheating: A malfunctioning thermostat housing can lead to engine overheating if it causes inadequate coolant flow or fails to regulate engine temperature properly. Overheating can result in engine damage or failure if not addressed promptly.
- Low Coolant Levels: Continuous coolant leaks from the thermostat housing can lead to low coolant levels. Regularly check the coolant level and top it off as needed to prevent engine damage and overheating.
- Check Engine Light: In some cases, issues with the thermostat housing may trigger the check engine light. The engine control unit (ECU) may detect problems related to coolant temperature or pressure.
- Temperature Fluctuations: If the thermostat housing is faulty, you may experience fluctuating engine temperatures. The engine may run too hot or too cold, indicating a problem with the thermostat or housing.
Diagnosing Issues with the Engine Coolant Thermostat Housing
Diagnosing issues with the engine coolant thermostat housing involves several steps:
- Visual Inspection: Perform a visual inspection of the thermostat housing and surrounding areas for signs of coolant leaks, cracks, or damage. Check for any coolant residue or pooling around the housing.
- Check for Leaks: Inspect the gasket or seal around the thermostat housing for signs of leaks or damage. A damaged gasket can lead to coolant leaks and reduced cooling system efficiency.
- Monitor Engine Temperature: Pay attention to the engine’s temperature gauge and check for any fluctuations or signs of overheating. Irregular temperature readings can indicate a problem with the thermostat housing or thermostat.
- Test Coolant Flow: Check the coolant flow through the radiator and hoses. Ensure that coolant is circulating properly and that there are no blockages or restrictions in the cooling system.
- Use a Diagnostic Scanner: Use an OBD-II scanner to check for any diagnostic trouble codes (DTCs) related to coolant temperature or cooling system performance. The scanner can provide additional insights into potential issues with the thermostat housing.
Replacing the Engine Coolant Thermostat Housing
If a problem with the thermostat housing is identified, replacing it is necessary to restore proper engine function. The replacement process typically involves the following steps:
- Prepare the Vehicle: Ensure the engine is cool before starting the replacement process. Disconnect the battery to prevent any electrical issues during the repair. Drain the coolant from the engine to prevent spills.
- Remove the Old Thermostat Housing: Locate the thermostat housing and remove any bolts or fasteners securing it to the engine. Carefully extract the old housing from its mounting position. Remove any old gasket material or sealant from the engine surface.
- Install the New Thermostat Housing: Position the new thermostat housing in the mounting location, ensuring it is properly aligned with the engine block. Secure the housing with the appropriate bolts or fasteners, following the manufacturer’s specifications.
- Install the New Gasket or Seal: Place a new gasket or seal around the base of the thermostat housing. Ensure that the gasket is properly seated to prevent coolant leaks.
- Reconnect Coolant Hoses: Reconnect any coolant hoses that were removed during the process. Ensure that the hoses are securely attached and free from leaks.
- Refill Coolant: Refill the cooling system with the appropriate type and amount of coolant. Bleed the system if necessary to remove any air pockets that may have formed during the replacement process.
- Check for Leaks: Start the engine and monitor the area around the thermostat housing for any signs of coolant leaks. Ensure that the engine reaches its operating temperature and that the cooling system is functioning correctly.
Choosing the Right Engine Coolant Thermostat Housing
When selecting a replacement thermostat housing, consider the following factors:
- OEM vs. Aftermarket: OEM (Original Equipment Manufacturer) thermostat housings are designed to meet the exact specifications of your vehicle and provide reliable performance. Aftermarket thermostat housings can vary in quality, so choose a reputable brand if opting for an aftermarket part.
- Compatibility: Ensure that the thermostat housing is compatible with your vehicle’s make, model, and engine configuration. Verify the part number and specifications before making a purchase.
- Material and Design: Choose a thermostat housing made from durable materials that can withstand the high temperatures and pressures of the engine’s cooling system. Consider the design of the housing, including any integrated features or seals, to ensure proper fit and function.
Follow us on Facebook for more parts.


