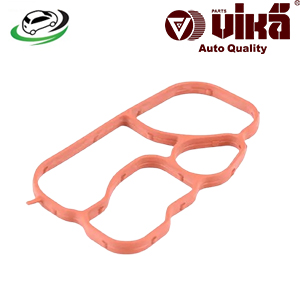
Get Radiator Hose Connector Audi B8 A4-2.0T/B8 A5-2.0T/B8 Allroad-2.0T/C7 A6-2.0T/Q5-2.0T / VW R32 MKV 3.2 N90692901
The radiator hose connector, also known as a hose coupling or radiator hose fitting, is a crucial component in the cooling system of a vehicle. It serves as the junction point where the radiator hoses connect to the radiator and engine, facilitating the flow of coolant throughout the system. Proper functioning of the radiator hose connector is essential for maintaining optimal engine temperatures and preventing overheating. This comprehensive overview will cover the design, function, importance, types, common issues, maintenance, and replacement of radiator hose connectors.
Design and Function
The radiator hose connector is designed to connect the radiator hoses to the radiator and engine block. It ensures a secure and leak-proof connection, allowing coolant to flow efficiently between the radiator and the engine. The connector is usually made from durable materials like metal (aluminum, brass, or steel) or high-quality plastic to withstand the high pressures and temperatures present in the cooling system.
Functionality:
- Secure Connection: The primary function of the radiator hose connector is to provide a tight and secure connection between the radiator hoses and the radiator or engine block. This prevents coolant leaks and ensures that coolant flows properly through the system.
- Maintaining Pressure: The connector helps maintain the proper pressure within the cooling system, which is crucial for efficient coolant circulation and engine cooling.
- Facilitating Coolant Flow: By connecting the hoses to the radiator and engine, the connector facilitates the continuous flow of coolant, which absorbs and dissipates heat from the engine.
Importance of the Radiator Hose Connector
The radiator hose connector plays a vital role in the overall performance and longevity of the engine’s cooling system. Here’s why it’s important:
- Preventing Coolant Leaks:
- Maintaining Coolant Levels: A secure and properly functioning connector prevents coolant from leaking out of the system. Coolant leaks can lead to low coolant levels, which can cause the engine to overheat.
- Protecting the Environment: Preventing coolant leaks also helps avoid environmental contamination, as coolant can be harmful to plants, animals, and water sources.
- Ensuring Proper Cooling:
- Regulating Engine Temperature: By facilitating a proper connection for coolant flow, the radiator hose connector ensures that the engine remains within the optimal temperature range. Efficient cooling is essential for engine performance and longevity.
- Preventing Overheating: A functioning connector helps prevent overheating by ensuring that coolant flows continuously through the radiator and engine.
- Maintaining System Pressure:
- Preventing Pressure Loss: The connector helps maintain the correct pressure in the cooling system. Proper pressure is essential for efficient coolant circulation and to prevent boiling or cavitation of the coolant.
- Ensuring Efficient Cooling: By maintaining system pressure, the connector supports the efficient operation of the radiator and other cooling system components.
Types of Radiator Hose Connectors
There are several types of radiator hose connectors, each designed for specific applications and cooling system configurations. Common types include:
- Straight Connectors:
- Design: Straight connectors are used to connect two sections of hose in a straight line. They are simple in design and often used when the hoses are aligned directly with each other.
- Application: Straight connectors are common in many standard cooling systems and are often used in both automotive and industrial applications.
- Elbow Connectors:
- Design: Elbow connectors are designed with a 90-degree or other angular bend to allow for changes in hose direction. They help accommodate the layout of the cooling system and connect hoses that need to change direction.
- Application: Elbow connectors are used in engines with complex layouts where hoses need to navigate around other components or obstacles.
- T-Connectors:
- Design: T-connectors have three ports and are used to connect three hoses in a “T” configuration. They allow coolant to flow to multiple destinations from a single connection point.
- Application: T-connectors are commonly used in systems with multiple coolant lines or where coolant needs to be diverted to additional components.
- Quick-Connect Fittings:
- Design: Quick-connect fittings allow for easy and rapid connection and disconnection of hoses without the need for tools. They typically use a locking mechanism to ensure a secure fit.
- Application: Quick-connect fittings are used in applications where frequent disconnection is required, such as in some modern vehicles and industrial machinery.
- Barbed Connectors:
- Design: Barbed connectors have ridges or “barbs” that grip the inside of the hose to secure it in place. They are often used with hose clamps to ensure a tight seal.
- Application: Barbed connectors are common in many cooling systems and are used in a variety of automotive and industrial applications.
Common Issues with Radiator Hose Connectors
Radiator hose connectors, like any other component, can experience issues that impact the performance of the cooling system. Common problems include:
- Leaks:
- Causes: Leaks can occur due to damaged or worn connectors, loose connections, or deteriorated seals. Leaks can lead to a loss of coolant and potential engine overheating.
- Signs: Look for coolant puddles under the vehicle, wet or stained areas around the connector, or a drop in coolant levels.
- Corrosion:
- Causes: Metal connectors can corrode over time due to exposure to coolant, moisture, and road salts. Corrosion can weaken the connector and lead to leaks or failure.
- Signs: Corrosion may appear as rust or discoloration on the connector. In severe cases, it can cause visible damage or flaking.
- Cracks and Damage:
- Causes: Connectors can become cracked or damaged due to excessive heat, pressure, or physical impact. Cracks can lead to coolant leaks and reduced system performance.
- Signs: Look for visible cracks or fractures in the connector material. Damaged connectors may also cause coolant to leak or spray.
- Loose Connections:
- Causes: Over time, connections can become loose due to vibration, thermal cycling, or improper installation. Loose connectors can lead to coolant leaks and decreased system efficiency.
- Signs: Check for loose or misaligned connectors. Tightening the connections may resolve the issue, but it’s important to inspect for underlying problems.
- Blockages:
- Causes: Blockages in the connector or surrounding hoses can restrict coolant flow and reduce cooling efficiency. Blockages can be caused by debris, sludge, or damaged components.
- Signs: Reduced engine cooling performance, overheating, or fluctuating coolant levels may indicate a blockage in the connector or system.
Maintenance and Inspection
Regular maintenance and inspection of the radiator hose connector are essential for ensuring the proper functioning of the cooling system. Here are some tips:
- Visual Inspections:
- Check for Leaks: Regularly inspect the area around the radiator hose connector for signs of leaks or coolant residue.
- Look for Corrosion: Check metal connectors for signs of corrosion or rust, which can weaken the connector and lead to failure.
- Hose and Connector Checks:
- Inspect Hoses: Examine the radiator hoses connected to the connector for signs of wear, cracking, or swelling. Replace any damaged hoses to prevent leaks and maintain proper cooling.
- Tighten Connections: Ensure that the connectors and hoses are securely attached and properly tightened. Use hose clamps if necessary to maintain a tight seal.
- Coolant System Maintenance:
- Check Coolant Levels: Regularly monitor coolant levels and top off as needed. Low coolant levels can indicate a leak in the system.
- Flush and Refill: Periodically flush and refill the coolant system to remove contaminants and ensure optimal performance.
Replacing the Radiator Hose Connector
Replacing a radiator hose connector is a straightforward process, but it requires attention to detail to ensure a proper seal and prevent leaks. Here’s a general guide:
- Preparation:
- Gather Tools and Parts: You’ll need a new radiator hose connector, basic hand tools, and possibly new hose clamps or seals.
- Drain Coolant: Drain the coolant from the radiator and engine to prevent spills and ensure a clean working environment.
- Remove the Old Connector:
- Disconnect Hoses: Remove the hoses from the old connector by loosening any clamps or fittings. Be prepared for coolant to spill out.
- Remove the Connector: Unbolt or unscrew the old connector from its mounting location. Carefully remove it, making sure not to damage surrounding components.
- Install the New Connector:
- Position the New Connector: Place the new connector in position, ensuring that it aligns correctly with the hoses and mounting points.
- Attach Hoses: Reattach the hoses to the new connector, securing them with clamps or fittings as needed. Ensure that all connections are tight and properly aligned.
- Refill and Test:
- Refill Coolant: Refill the cooling system with the appropriate coolant, following the manufacturer’s specifications. Check for leaks around the new connector.
- Test the System: Start the engine and let it run for a few minutes, monitoring the temperature and checking for any signs of leaks or issues.
- Final Checks:
- Monitor Performance: After replacement, monitor the cooling system for proper performance and check for any unusual noises, leaks, or temperature fluctuations.
- Inspect Regularly: Continue to inspect the connector and surrounding components regularly to ensure that the cooling system remains in good condition.
Follow us on Facebook for more parts.