-34%
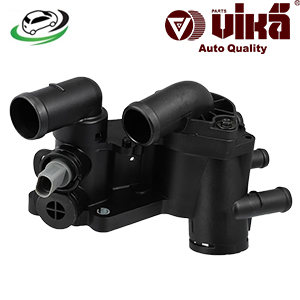
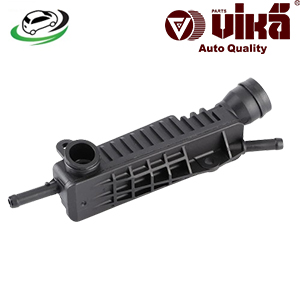
Get Intake System Heater Pipe VW Caddy 2K/ Golf 1K/ Golf 5K/ Golf AJ/ Golf Plus 52/ Polo Hatchback 9N 036121188B
The intake system heater pipe is a critical component in the engine’s air intake system, designed to assist in managing the temperature of the air entering the engine. This component helps ensure optimal engine performance and efficiency by maintaining the correct air temperature and reducing the likelihood of condensation and freezing issues. In this guide, we will explore the function, design, common issues, replacement process, and maintenance tips for the intake system heater pipe.
1. Understanding the Intake System Heater Pipe
a. Role of the Intake System Heater Pipe:
The intake system heater pipe serves several important functions:
- Temperature Regulation: It helps to regulate the temperature of the air entering the engine by providing additional heat if needed. This is especially important in cold weather conditions where cold air can cause poor engine performance and increased emissions.
- Preventing Condensation: By warming the intake air, the heater pipe helps to reduce the risk of condensation forming in the intake system. Condensation can lead to water accumulation, which can adversely affect engine performance and cause damage.
- Improving Combustion Efficiency: Proper air temperature contributes to more efficient combustion, which enhances engine performance, fuel efficiency, and emissions control.
b. Design and Construction:
- Material: Intake system heater pipes are typically made from metal (such as aluminum or steel) or high-temperature-resistant plastic. The material must be capable of withstanding high temperatures and exposure to engine components.
- Shape and Placement: The heater pipe is designed to fit within the intake system, often running parallel to the intake manifold or air ducts. It may have various bends and connections to integrate with the rest of the intake system.
- Heating Element: Some heater pipes include an integrated heating element or are connected to an external heater element. This element is responsible for generating heat to warm the incoming air.
c. Location:
The intake system heater pipe is usually located within the intake manifold or air duct assembly. Its exact location depends on the vehicle’s make and model, as well as the design of the intake system.
2. Function of the Intake System Heater Pipe
a. Enhancing Air Intake Temperature:
The primary function of the intake system heater pipe is to warm the air entering the engine. In cold weather conditions, the temperature of the air can be significantly lower than the engine’s optimal operating temperature. By heating the intake air, the heater pipe helps to bring it closer to the ideal temperature for combustion.
b. Preventing Ice Formation:
In extremely cold conditions, moisture in the intake air can freeze and cause ice formation. This ice can obstruct airflow, leading to reduced engine performance and potential damage. The heater pipe helps to prevent ice formation by warming the air and reducing the likelihood of condensation.
c. Improving Engine Performance:
Warmed intake air helps to improve engine performance by ensuring that the air-fuel mixture is at the right temperature for efficient combustion. This can result in smoother engine operation, better throttle response, and increased fuel efficiency.
d. Reducing Emissions:
Proper air temperature contributes to more complete combustion of fuel, which can help reduce harmful emissions. By ensuring that the intake air is at the optimal temperature, the heater pipe helps to minimize the production of pollutants.
3. Common Issues with the Intake System Heater Pipe
a. Heater Pipe Leaks:
Leaks in the intake system heater pipe can occur due to:
- Cracks or Damage: Physical damage to the pipe, such as cracks or holes, can lead to coolant or air leaks.
- Faulty Connections: Loose or improperly secured connections can cause leaks around the pipe.
b. Heater Element Failure:
If the heater pipe includes an integrated heating element, it may fail over time due to:
- Electrical Issues: Faulty wiring or connections can prevent the heating element from functioning properly.
- Element Wear: The heating element may wear out due to prolonged use or exposure to high temperatures.
c. Ice Formation:
Inadequate heating of the intake air can lead to ice formation, particularly in very cold conditions. This can result in reduced airflow, engine performance issues, and potential damage to the intake system.
d. Blocked or Restricted Airflow:
Debris, dirt, or contaminants can block or restrict airflow through the intake system heater pipe. This can reduce the effectiveness of the heating process and negatively impact engine performance.
e. Corrosion:
Metal heater pipes can suffer from corrosion due to exposure to moisture, road salt, and other environmental factors. Corrosion can weaken the pipe and lead to leaks or other issues.
4. Replacing the Intake System Heater Pipe: Step-by-Step Guide
a. Preparation:
Before starting the replacement process, gather all necessary tools and supplies, including the new intake system heater pipe, seals or gaskets, a wrench or socket set, and any other required components. Ensure the vehicle is parked on a level surface and the engine is cool.
b. Removing the Old Heater Pipe:
- Step 1: Locate the intake system heater pipe and identify any connections or clamps securing it in place.
- Step 2: Disconnect any hoses or electrical connectors attached to the heater pipe.
- Step 3: Remove the bolts or clamps securing the heater pipe to the intake manifold or air duct assembly.
- Step 4: Carefully remove the old heater pipe, being mindful of any coolant or debris that may be present.
c. Installing the New Heater Pipe:
- Step 1: Clean the mating surfaces on the intake manifold and air duct assembly to remove any old gasket material or debris.
- Step 2: Place the new gasket or seal onto the mating surface, if applicable.
- Step 3: Position the new heater pipe in place, aligning it with the mounting holes or clamps.
- Step 4: Secure the heater pipe by tightening the bolts or clamps to the manufacturer’s specifications.
- Step 5: Reconnect any hoses or electrical connectors to the new heater pipe.
d. Final Checks:
- Step 1: Start the engine and let it run for a few minutes. Check for any signs of leaks or issues around the new heater pipe.
- Step 2: Monitor the engine performance and temperature to ensure that the new heater pipe is functioning correctly.
- Step 3: Take the vehicle for a short test drive, paying attention to any unusual noises or performance issues.
5. Maintenance Tips for the Intake System Heater Pipe
a. Regular Inspections:
Periodically inspect the intake system heater pipe and surrounding components for signs of damage, leaks, or corrosion. Early detection of issues can help prevent more significant problems and ensure the proper functioning of the heater pipe.
b. Keep the Intake System Clean:
Regularly clean the intake system to prevent the buildup of debris or contaminants that can block airflow or affect the heating process. Follow the manufacturer’s recommendations for cleaning and maintenance.
c. Check for Proper Functioning:
Ensure that the heater pipe and its associated heating element (if applicable) are functioning correctly. Pay attention to the engine’s performance, especially during cold weather conditions, to ensure that the heater pipe is effectively warming the intake air.
d. Address Corrosion Promptly:
If you notice signs of corrosion on the heater pipe, address them promptly to prevent further damage. Consider applying a corrosion-resistant coating or replacing the pipe if necessary.
e. Monitor Coolant Levels:
If the heater pipe is part of a coolant system, regularly check and maintain the proper coolant level. Low coolant levels can affect the heater pipe’s performance and lead to engine overheating.
Follow us on Facebook for more parts.


