-33%
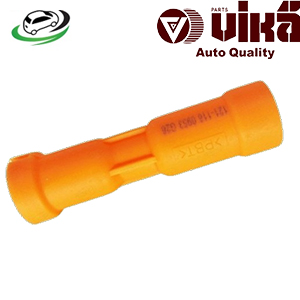
Get VW Golf I II III/ Fox/Caddy/Polo Dip Stick Guide 53103663
The dipstick, though small in size, plays a critical role in maintaining your vehicle’s engine health. This simple tool allows drivers and mechanics to monitor oil levels and overall engine condition without the need for complex equipment. A dipstick is a metal rod with markings that indicate the level of the oil in the engine. Its regular use ensures that the engine has sufficient oil to function smoothly, preventing wear and tear, reducing friction, and maintaining optimal engine temperature.
In this guide, we’ll explore the function of a dipstick, how to use it, and how to maintain and troubleshoot common issues related to oil level monitoring.
1. What is a Dipstick?
The dipstick is a metal or plastic rod inserted into the engine’s oil sump. It has a handle at the top and markings at the bottom, which are designed to show the oil level within the engine. These markings usually indicate “Low,” “Full,” and sometimes “Add Oil” levels.
Dipsticks are vehicle-specific, meaning they are designed to work with particular engines. Though many vehicles use similar designs, it is essential to ensure that the dipstick is properly calibrated for the vehicle’s oil capacity and engine specifications.
2. How a Dipstick Works
A dipstick works through direct immersion in engine oil. As it is inserted into the dipstick tube, it comes into contact with the oil in the sump (oil reservoir). When you pull it out, the oil clings to the markings, visually indicating the current oil level.
Most dipsticks feature two markings:
- Minimum (Low): This marking indicates the lowest acceptable oil level. If the oil is below this level, it can cause severe engine damage due to insufficient lubrication.
- Maximum (Full): The full mark shows the highest acceptable oil level. Exceeding this level may result in oil aeration (mixing with air), causing engine malfunction or damage.
3. Why is Checking Oil Level Important?
Engine oil is vital for lubricating moving components within the engine, reducing friction, and preventing wear. Additionally, it helps cool engine parts, remove contaminants, and protect against corrosion. An insufficient oil level can lead to:
- Overheating: Oil helps dissipate heat from engine components, preventing them from overheating.
- Increased Friction: Without proper lubrication, metal parts will grind against each other, causing premature wear or engine seizure.
- Engine Failure: Running an engine with low oil levels can cause catastrophic engine failure, which could be extremely expensive to repair.
Conversely, overfilling with oil can also cause problems, such as:
- Excess Pressure: Too much oil can increase pressure inside the engine, potentially damaging seals and gaskets.
- Oil Aeration: When the crankshaft churns through excessive oil, it can aerate the oil, reducing its lubricating properties and leading to poor engine performance.
4. How to Check Your Oil Level Using a Dipstick
Checking your oil is a simple process but requires a few key steps to ensure accuracy:
Step 1: Park Your Vehicle on a Level Surface
To get an accurate reading, ensure that the vehicle is parked on flat ground. An uneven surface can skew the oil level reading.
Step 2: Turn Off the Engine
Allow the engine to cool for a few minutes before checking the oil. Hot oil can expand, giving a false reading. Additionally, this prevents potential burns from touching a hot engine component.
Step 3: Locate the Dipstick
In most vehicles, the dipstick is located near the engine. It typically has a brightly colored handle, often yellow or orange, making it easier to identify.
Step 4: Remove and Clean the Dipstick
Pull out the dipstick and wipe it clean with a lint-free cloth. This first step removes excess oil and debris, ensuring an accurate reading.
Step 5: Reinsert the Dipstick
Insert the dipstick fully back into its tube to ensure it dips into the oil reservoir.
Step 6: Check the Oil Level
Pull the dipstick out again and examine the oil level on the markings. The oil should be between the “Low” and “Full” marks. If it is below the minimum mark, you’ll need to add oil. If it is near or above the maximum, you may need to drain some oil to prevent issues.
Step 7: Inspect the Oil’s Condition
Aside from checking the oil level, it’s essential to assess the oil’s color and consistency:
- Clean Oil: Fresh oil is usually amber or light brown.
- Dirty Oil: Over time, oil will turn dark brown or black, indicating it may need to be changed.
- Milky or Frothy Oil: This could indicate water contamination, possibly due to a blown head gasket or another significant issue.
5. How to Add Oil
If the oil level is low, top it up by adding the correct type of oil for your vehicle. Refer to your vehicle’s owner manual for the recommended oil viscosity and type. When adding oil:
- Pour the oil slowly to avoid overfilling.
- Wait a few minutes after adding oil, then check the dipstick again to ensure the level is correct.
6. Types of Engine Oil for Dipstick Checks
The engine oil you use will significantly impact your dipstick readings and overall engine health. Here are some common types of oil:
- Conventional Oil: Traditional motor oil, suitable for older vehicles or engines without high-performance needs.
- Synthetic Oil: Offers superior lubrication, enhanced protection, and extended oil change intervals.
- Synthetic Blend Oil: A mixture of synthetic and conventional oil, providing a balance between cost and performance.
- High-Mileage Oil: Designed for vehicles with over 75,000 miles, this oil often includes additives to protect worn seals and reduce leaks.
Using the wrong type of oil can cause incorrect dipstick readings due to varying oil viscosities and expansion rates.
7. Maintaining the Dipstick
The dipstick itself requires minimal maintenance. However, keeping the dipstick tube and surrounding area clean will prevent contaminants from entering the engine. Inspect the dipstick for signs of damage:
- Bent or Misaligned: A bent dipstick can give inaccurate readings.
- Worn Markings: If the markings are hard to read, you may need to replace the dipstick.
- Corrosion: A corroded dipstick can introduce contaminants into the oil, affecting engine performance.
8. Common Dipstick Issues and Troubleshooting
Some common issues with dipstick readings include:
- Inconsistent Readings: This could occur due to oil clinging to the dipstick tube. Reinsert the dipstick multiple times to ensure an accurate reading.
- Foamy or Frothy Oil: This may indicate overfilled oil or coolant mixing with the oil, which requires immediate attention.
Conclusion
The dipstick is an essential tool for monitoring your engine’s oil level and health. Regular oil checks using the dipstick can prevent engine damage, extend the engine’s life, and ensure your vehicle operates smoothly. Knowing how to properly use and maintain the dipstick will keep your engine in top condition, reducing the risk of costly repairs.
Follow us on Facebook for more parts.


Reviews
Clear filtersThere are no reviews yet.