-2%
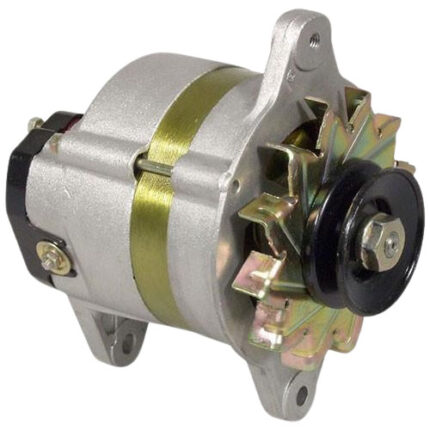
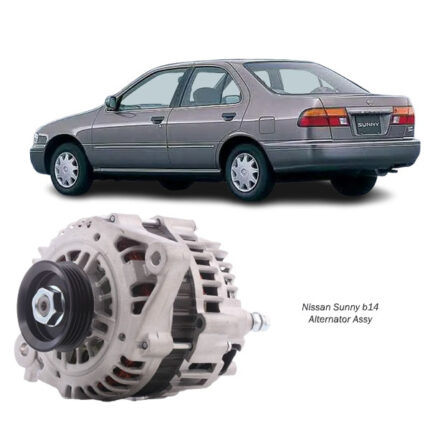
Get Alternator Assy for Nissan with J15 (L16 Z20) Engine 23100-H6201 in Kenya
The alternator assembly is a critical component in modern vehicles, responsible for generating electrical power to run various systems and recharge the battery. Its seamless operation ensures that all electrical functions, from headlights to infotainment systems, perform reliably. This document explores the structure, functionality, benefits, common issues, and maintenance of alternator assemblies in detail.
What is an Alternator Assembly?
An alternator assembly is a mechanical device that converts mechanical energy from the engine into electrical energy. This is achieved through the principle of electromagnetic induction. The alternator is mounted on the engine and is driven by a belt connected to the engine’s crankshaft. Its primary role is to supply continuous electrical power to the vehicle’s electrical systems and recharge the battery, ensuring a consistent power supply during vehicle operation.
Components of an Alternator Assembly
The alternator assembly comprises several interconnected components:
- Rotor and Stator:
- Rotor: A rotating electromagnet that creates a magnetic field.
- Stator: A stationary coil of wire that generates electricity as the rotor’s magnetic field passes through it.
- Diode Rectifier:
- Converts the alternating current (AC) produced by the stator into direct current (DC) required by the vehicle’s electrical systems.
- Voltage Regulator:
- Maintains a consistent voltage level, protecting the vehicle’s electrical components from power surges.
- Drive Belt:
- Transfers mechanical energy from the engine to the alternator’s rotor.
- Pulley:
- Facilitates the connection between the drive belt and the alternator.
- Cooling System:
- Includes fans and vents to dissipate heat generated during the conversion process.
How Does the Alternator Assembly Work?
- Mechanical Energy Transfer:
- The engine’s crankshaft drives the alternator via the drive belt, spinning the rotor inside the stator.
- Magnetic Field Generation:
- The rotor, powered by the vehicle’s battery, creates a magnetic field as it rotates.
- Electromagnetic Induction:
- As the rotor spins, its magnetic field induces an electrical current in the stator’s coils.
- AC to DC Conversion:
- The diode rectifier converts the AC electricity generated into DC electricity.
- Voltage Regulation:
- The voltage regulator ensures that the electrical output remains within a safe range, typically between 13.5 and 14.5 volts.
Benefits of the Alternator Assembly
- Continuous Power Supply:
- Keeps all electrical components operational, from lights to wipers.
- Battery Maintenance:
- Recharges the battery, ensuring it remains fully charged and ready to start the engine.
- Efficient Energy Management:
- Regulates power distribution to prevent overloading or underpowering components.
- Durability and Reliability:
- Built to withstand high temperatures and mechanical stress, offering long service life with proper maintenance.
Signs of a Faulty Alternator
- Dim or Flickering Lights:
- Indicates inconsistent power output.
- Battery Warning Light:
- Often illuminates on the dashboard when the alternator is failing.
- Dead Battery:
- A faulty alternator cannot recharge the battery effectively.
- Unusual Sounds:
- Grinding or whining noises may point to a worn-out bearing or other internal issues.
- Electrical Failures:
- Malfunctioning accessories like power windows or audio systems.
Common Issues with Alternator Assemblies
- Worn-Out Bearings:
- Leads to noisy operation and eventual failure of the alternator.
- Faulty Diode Rectifier:
- Results in power loss or inability to convert AC to DC.
- Broken Drive Belt:
- Prevents the alternator from generating power as the rotor stops spinning.
- Voltage Regulator Failure:
- Causes inconsistent power output or damage to electrical components.
- Overheating:
- Can damage internal components, often due to blocked vents or excessive dirt.
Maintenance Tips for Alternator Assemblies
- Regular Inspection:
- Check the alternator and its connections for wear, corrosion, or damage during routine vehicle servicing.
- Cleanliness:
- Ensure the alternator remains free of dirt and debris to prevent overheating.
- Drive Belt Check:
- Inspect for cracks, fraying, or looseness. Replace the belt if it shows signs of wear.
- Monitor Electrical Systems:
- Pay attention to any warning lights or unusual behavior in the vehicle’s electrical systems.
- Battery Health:
- Maintain the battery’s charge and ensure its terminals are clean and secure.
- Professional Servicing:
- Have a qualified technician diagnose and repair alternator issues.
Replacing an Alternator Assembly
Replacing a faulty alternator involves:
- Disconnecting the Battery:
- Prevents electrical shock or damage during the replacement process.
- Removing the Drive Belt:
- Loosen the tensioner to slide the belt off the pulley.
- Disconnecting Electrical Connections:
- Carefully unplug the wiring harness and any other connections.
- Removing the Alternator:
- Unscrew the mounting bolts and take out the old alternator.
- Installing the New Alternator:
- Reverse the steps above, ensuring secure connections and proper alignment of the drive belt.
- Testing the System:
- Verify the new alternator’s functionality using a multimeter or diagnostic tool.
Conclusion
The alternator assembly is indispensable for the optimal functioning of a vehicle’s electrical systems. Regular maintenance and timely repairs can prolong its lifespan, enhance reliability, and prevent unexpected breakdowns. Understanding its components and operation allows vehicle owners and technicians to address potential issues effectively, ensuring a smooth and energy-efficient driving experience.
Follow us on Facebook for more parts.


Reviews
Clear filtersThere are no reviews yet.