-28%
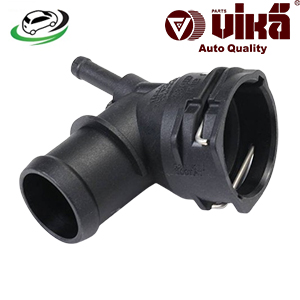
Get Coolant Flange (Upper Radiator) Volkswagen Beetle/Passat/Golf CC 2.0T TDI/Golf MK6 / AUDI A3 TT 3C0122291
A coolant flange is an essential component in a vehicle’s cooling system, designed to connect various parts of the engine and coolant system together. It serves as a junction point for hoses and pipes that transport coolant throughout the engine to maintain optimal operating temperatures. In this comprehensive guide, we will explore the function, types, benefits, maintenance, and common issues associated with coolant flanges.
Function of a Coolant Flange
Connection Point
The primary function of a coolant flange is to act as a connection point for different parts of the cooling system. It typically connects the engine block, cylinder head, radiator hoses, and heater hoses, ensuring a seamless flow of coolant.
Sealant
Coolant flanges provide a sealed connection to prevent coolant leaks. They are designed to withstand high temperatures and pressures, maintaining a tight seal to keep the coolant within the system.
Temperature Regulation
By ensuring the proper flow of coolant, the coolant flange plays a crucial role in regulating the engine’s temperature. This helps prevent overheating and maintains efficient engine performance.
Types of Coolant Flanges
- Plastic Coolant Flanges
- Construction: Made from high-temperature resistant plastic materials.
- Advantages: Lightweight, cost-effective, and resistant to corrosion.
- Disadvantages: Prone to cracking and wear over time, especially under extreme temperature variations.
- Metal Coolant Flanges
- Construction: Typically made from aluminum, steel, or other metals.
- Advantages: Highly durable, resistant to high temperatures and pressure, and longer-lasting than plastic flanges.
- Disadvantages: Heavier and more expensive than plastic flanges, and can corrode if not properly maintained.
- Composite Coolant Flanges
- Construction: Made from a combination of materials, often plastic reinforced with metal.
- Advantages: Combines the benefits of both plastic and metal, offering durability and lightweight properties.
- Disadvantages: Can be more complex and expensive to manufacture and replace.
Benefits of High-Quality Coolant Flanges
Reliable Coolant Flow
High-quality coolant flanges ensure a reliable and uninterrupted flow of coolant through the engine, which is crucial for maintaining optimal engine temperatures and preventing overheating.
Durability and Longevity
Investing in high-quality coolant flanges enhances the durability and longevity of the cooling system. They are less likely to crack, warp, or corrode, reducing the need for frequent replacements.
Improved Engine Performance
Efficient coolant flow helps maintain optimal engine temperatures, leading to improved engine performance, fuel efficiency, and reduced emissions.
Leak Prevention
High-quality coolant flanges provide a secure seal, preventing coolant leaks that could lead to engine overheating and potential damage.
Compatibility and Fit
OEM (Original Equipment Manufacturer) coolant flanges or high-quality aftermarket options are designed to fit precisely, ensuring compatibility with the vehicle’s cooling system components.
Maintenance of Coolant Flanges
Regular Inspection
- Visual Checks: Regularly inspect the coolant flanges for signs of wear, cracks, or leaks. Look for coolant residue or stains around the flange connections.
- Feel for Leaks: Run your hand around the flange area to check for any wetness or moisture, indicating a potential leak.
Proper Coolant Levels
- Check Coolant Levels: Ensure the coolant reservoir is filled to the appropriate level. Low coolant levels can lead to overheating and increased pressure on the coolant flanges.
- Use Correct Coolant: Always use the manufacturer-recommended coolant type to prevent chemical reactions that could damage the flanges and other cooling system components.
Cleaning and Maintenance
- Keep Clean: Ensure the flange area is clean and free from dirt and debris. This helps prevent contamination and wear.
- Replace Gaskets: If the flange uses gaskets or seals, ensure they are in good condition and replace them if they show signs of wear or damage.
Replacement Intervals
- Manufacturer’s Recommendations: Follow the vehicle manufacturer’s guidelines for replacing coolant flanges and associated components.
- Signs of Wear: Replace coolant flanges if you notice cracks, leaks, or significant wear. Do not wait for complete failure, as this can lead to more extensive engine damage.
Common Issues with Coolant Flanges
Cracks and Leaks
- Symptoms: Coolant leaks, visible cracks, or coolant pooling under the vehicle.
- Causes: Exposure to extreme temperatures, pressure, and engine vibrations can cause plastic flanges to crack and metal flanges to develop stress fractures.
Corrosion
- Symptoms: Rust or corrosion around the flange, leading to weakened connections and potential leaks.
- Causes: Exposure to moisture, road salt, and improper coolant mixtures can cause metal flanges to corrode over time.
Warping
- Symptoms: Coolant leaks, difficulty in sealing, or misaligned connections.
- Causes: Excessive heat and pressure can cause plastic flanges to warp, compromising their ability to form a tight seal.
Loose Connections
- Symptoms: Coolant leaks, low coolant levels, or overheating.
- Causes: Vibration and thermal expansion can cause flange connections to loosen over time, leading to leaks and inefficient coolant flow.
Replacement of Coolant Flanges
Tools and Equipment
- Basic Tools: Screwdrivers, wrenches, socket sets, and pliers.
- Replacement Flanges: Ensure the new flanges are compatible with the make and model of the vehicle.
- Gaskets and Seals: New gaskets or seals if required.
Steps for Replacement
- Safety First: Ensure the engine is cool before starting the replacement process to avoid burns from hot coolant.
- Drain Coolant: Drain the coolant from the system to prevent spills and contamination during the replacement process.
- Remove Old Flange: Locate and carefully remove the old flange, disconnecting any hoses or components attached to it.
- Clean Surface: Clean the mounting surface to ensure a proper seal with the new flange.
- Install New Flange: Attach the new flange, ensuring all connections are secure and properly aligned. Replace any gaskets or seals as needed.
- Refill Coolant: Refill the coolant system with the appropriate type and amount of coolant.
- Test for Leaks: Start the engine and let it run to check for any leaks or issues with the new flange installation.
Follow us on Facebook for more parts.


