-20%
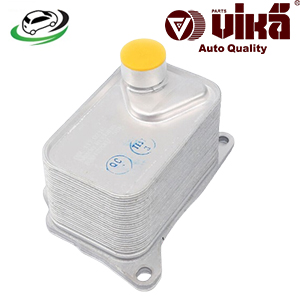
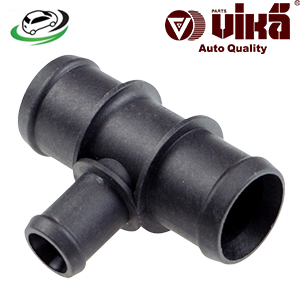
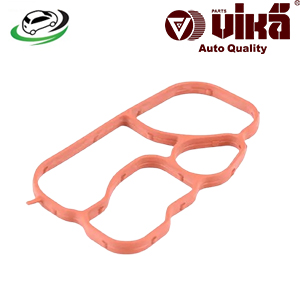
Get Engine Oil Cooler Gasket Audi A3 8V/B9 A4/B9 Q5 / VW Arteon/Atlas/Golf VII/Golf VII R/Jetta VI/Jetta VII/Passat B7/Passat B7.5/Tiguan MQB 06L117070
The engine oil cooler gasket, though a small and often overlooked component, plays a critical role in the operation of an engine’s cooling and lubrication systems. Its primary function is to seal the connection between the engine oil cooler and the engine block, ensuring that engine oil flows correctly through the oil cooler without leaking. This detailed overview will cover the design, function, types, importance, maintenance, signs of failure, and the replacement process of an engine oil cooler gasket.
Design and Function
The engine oil cooler gasket is typically made from high-quality, heat-resistant materials such as rubber, silicone, or metal-reinforced composites. These materials are chosen for their ability to withstand the high temperatures and pressures found in an engine’s oil system. The gasket is usually designed to fit precisely between the oil cooler and the engine block, matching the contours and bolt patterns of these components to create a secure, leak-proof seal.
Functionality:
- Sealing the Connection: The primary function of the oil cooler gasket is to seal the joint between the engine block and the oil cooler. This seal prevents engine oil from leaking out of the system and ensures that the oil flows properly through the cooler.
- Maintaining Pressure: In addition to preventing leaks, the gasket helps maintain the correct oil pressure within the cooling system. Proper pressure is essential for efficient oil circulation and heat dissipation.
- Isolating Fluids: In some engine designs, the oil cooler gasket may also serve to isolate oil from coolant, especially in systems where the oil cooler is integrated with the engine’s cooling system. The gasket prevents the two fluids from mixing, which could lead to engine damage.
Types of Engine Oil Cooler Gaskets
Engine oil cooler gaskets come in various shapes and sizes, depending on the engine design and the type of oil cooler used. Some common types include:
- Flat Gaskets:
- Design: Flat gaskets are made from materials like rubber, cork, or composite materials. They are typically used in simpler oil cooler designs where the surfaces of the cooler and engine block are flat and smooth.
- Application: Flat gaskets are commonly used in older or simpler engine designs where precise sealing is not as critical.
- O-Ring Gaskets:
- Design: These gaskets are circular and made from flexible rubber or silicone. O-rings are often used in oil coolers with round connections or where the gasket needs to provide a seal around a cylindrical surface.
- Application: O-ring gaskets are common in modern engines and are used in both air-to-oil and water-to-oil coolers.
- Molded Gaskets:
- Design: Molded gaskets are custom-shaped to fit the specific contours of the oil cooler and engine block. They are usually made from rubber or silicone and may include metal reinforcement for added durability.
- Application: Molded gaskets are used in complex engine designs where precise sealing is required, such as in high-performance or heavy-duty engines.
- Metal Gaskets:
- Design: Metal gaskets are typically made from materials like copper, aluminum, or steel, and are used in high-temperature and high-pressure applications. They may be coated with a layer of rubber or composite material to enhance the seal.
- Application: Metal gaskets are often used in high-performance or industrial engines where durability and heat resistance are critical.
Importance of the Engine Oil Cooler Gasket
The engine oil cooler gasket plays a vital role in ensuring the proper functioning of the engine’s oil and cooling systems. Here’s why it’s so important:
- Preventing Oil Leaks:
- Maintaining Oil Levels: The gasket prevents oil from leaking out of the oil cooler assembly. Leaks can lead to low oil levels, which can cause inadequate lubrication, increased friction, and potential engine damage.
- Protecting the Environment: Oil leaks are not only harmful to the engine but can also cause environmental damage by contaminating the ground and water sources.
- Ensuring Proper Cooling:
- Maintaining Oil Temperature: The oil cooler relies on a steady flow of oil to dissipate heat. If the gasket fails and oil leaks out, the cooler may not function effectively, leading to higher oil temperatures and potential overheating.
- Enhancing Engine Performance: By ensuring that the oil cooler operates correctly, the gasket helps maintain the engine’s optimal temperature, which is crucial for efficient performance and longevity.
- Preventing Fluid Contamination:
- Isolating Oil and Coolant: In systems where the oil cooler is integrated with the engine’s coolant system, the gasket prevents oil and coolant from mixing. Fluid contamination can lead to poor cooling, corrosion, and serious engine damage.
- Maintaining Engine Integrity: A failure in the gasket can compromise the entire engine cooling and lubrication system, leading to significant engine issues and costly repairs.
Maintenance and Inspection
Regular maintenance and inspection of the engine oil cooler gasket are essential to ensure the longevity and reliability of the engine. Here are some key maintenance tips:
- Regular Inspections:
- Visual Checks: Regularly inspect the oil cooler gasket for signs of wear, cracks, or leaks. Look for oil residue or wet spots around the gasket area, which may indicate a leak.
- Pressure Testing: Periodically test the oil system pressure to ensure that the gasket is maintaining the correct seal. A drop in pressure may indicate a failing gasket.
- Oil Changes:
- Monitor for Contaminants: During oil changes, check the used oil for signs of coolant contamination or metal particles, which could indicate a failing gasket or other engine issues.
- Check for Leaks: After an oil change, monitor the area around the oil cooler gasket for any signs of fresh leaks, especially if the gasket was recently replaced.
- Cooling System Maintenance:
- Check Coolant Levels: In systems where the oil cooler is integrated with the coolant system, regularly check the coolant levels and inspect for signs of oil contamination in the coolant.
- Cooling System Flush: Periodically flush the cooling system to remove any contaminants that could compromise the gasket’s effectiveness.
Signs of a Failing Engine Oil Cooler Gasket
A failing engine oil cooler gasket can lead to several symptoms, indicating that it needs to be replaced. Common signs include:
- Oil Leaks:
- Visible Oil Leaks: One of the most obvious signs of a failing gasket is oil leaking from the oil cooler area. You may notice oil puddles under the vehicle or see oil dripping from the engine.
- Oil Residue: Look for oil residue or stains around the gasket area. Even if the leak is small, it can lead to more significant issues over time.
- Engine Overheating:
- Rising Temperature Gauge: If the oil cooler gasket fails, the oil cooler may not function properly, leading to higher engine oil temperatures. This can cause the engine temperature to rise, which you’ll notice on the temperature gauge.
- Frequent Overheating: If the engine frequently overheats, especially under normal driving conditions, a failing gasket could be the cause.
- Low Oil Pressure:
- Oil Pressure Warning Light: A drop in oil pressure can occur if the gasket fails and oil leaks out of the system. You may see the oil pressure warning light on your dashboard, indicating a problem.
- Poor Engine Performance: Low oil pressure can lead to poor engine performance, as the engine may not receive adequate lubrication, causing increased friction and wear.
- Coolant Contamination:
- Milky Oil or Coolant: If the oil cooler gasket fails in a system that integrates oil and coolant, you may notice a milky or frothy appearance in the engine oil or coolant. This indicates that the two fluids are mixing, which can cause significant engine damage.
Replacing the Engine Oil Cooler Gasket
Replacing the engine oil cooler gasket is a relatively straightforward process, but it requires attention to detail to ensure a proper seal and prevent future leaks. Here’s a general overview of the replacement process:
- Preparation:
- Gather Tools and Parts: You’ll need the correct gasket for your engine model, as well as basic tools like wrenches, a torque wrench, and possibly a gasket scraper.
- Drain Oil and Coolant: Before starting, drain the engine oil and, if applicable, the coolant from the system. This prevents spills and makes it easier to work on the oil cooler.
- Remove the Oil Cooler:
- Disconnect Hoses: Disconnect any hoses or lines connected to the oil cooler, taking care to catch any residual oil or coolant.
- Unbolt the Cooler: Remove the bolts securing the oil cooler to the engine block. Carefully remove the cooler, being mindful not to damage the cooler or surrounding components.
- Remove the Old Gasket:
- Clean the Surface: Use a gasket scraper to remove the old gasket material from both the oil cooler and engine block surfaces. Ensure the surfaces are clean and smooth, as any leftover material can prevent a proper seal.
- Inspect for Damage: While the cooler is removed, inspect it for any signs of damage or corrosion that could compromise its function.
- Install the New Gasket:
- Position the Gasket: Place the new gasket on the oil cooler, ensuring it is correctly aligned with the bolt holes and oil passages.
- Reattach the Oil Cooler: Carefully position the oil cooler back onto the engine block, ensuring the gasket stays in place. Tighten the bolts to the manufacturer’s specified torque.
- Reassemble and Refill:
- Reconnect Hoses: Reattach any hoses or lines disconnected earlier, ensuring they are securely fastened.
- Refill Fluids: Refill the engine oil and coolant, if applicable. Check for any leaks around the gasket area after refilling.
- Final Checks:
- Start the Engine: Start the engine and let it run for a few minutes, checking for leaks and ensuring that the oil pressure and temperature are within the normal range.
- Monitor for Leaks: After a test drive, recheck the gasket area for any signs of leaks or oil residue.
Follow us on Facebook for more parts.


