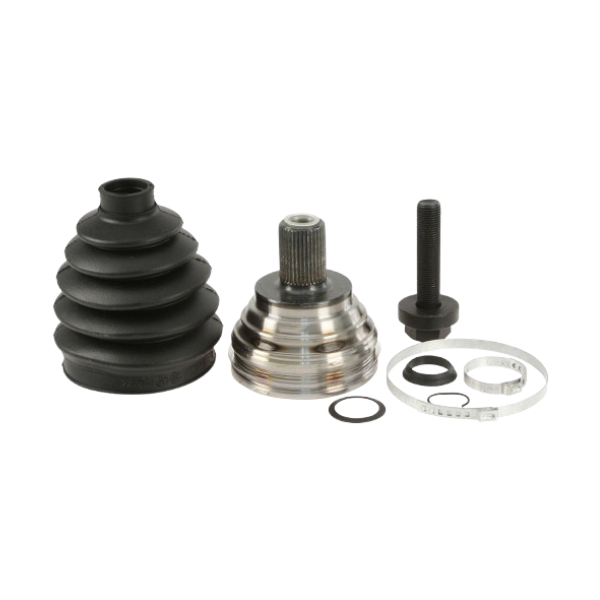
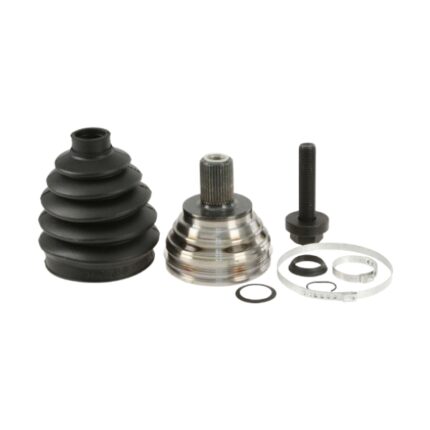
Get AUDI A1/A3 Front CV Joint Assy Without ABS 1K0498099BX in Kenya
Constant Velocity (CV) joints are essential components in modern automotive drivetrains, particularly in front-wheel drive and all-wheel drive vehicles. They allow for smooth and efficient power transfer from the transmission to the wheels while accommodating the up-and-down motion of the suspension and steering angles. Understanding the function, types, maintenance, and common issues associated with CV joints is crucial for maintaining vehicle performance and safety.
Function of CV Joints
- Power Transfer: CV joints transmit torque from the transmission to the drive wheels, ensuring consistent and reliable power delivery.
- Flexibility: They allow the drive shafts to flex and accommodate the movement of the suspension and steering. This flexibility is essential for maintaining smooth operation, especially when the wheels are turning or the suspension is moving.
- Efficiency: CV joints are designed to maintain a constant velocity of the driven shaft, regardless of the angle of the joint. This ensures efficient power transfer and reduces vibrations.
- Smooth Driving: By allowing for smooth power transmission and accommodating various angles, CV joints contribute to a smoother driving experience with less noise and vibration.
Types of CV Joints
- Rzeppa Joints: These are the most common type of CV joints, featuring a spherical design with six balls that move within grooves. They are typically used in front-wheel drive vehicles.
- Tripod Joints: These joints have three roller bearings that move within a cylindrical housing. They are commonly used in the inner CV joint of front-wheel drive vehicles and in some rear-wheel drive applications.
- Double Offset Joints: These joints are used in applications requiring a larger range of motion. They feature a dual-ball bearing design that allows for greater flexibility.
- Plunge Joints: These joints allow for axial movement (plunging) in addition to angular movement. They are often used in conjunction with other CV joints to accommodate changes in length as the suspension moves.
Signs of Worn or Failing CV Joints
- Clicking or Popping Noises: One of the most common signs of a failing CV joint is a clicking or popping noise when turning. This indicates that the joint is worn and may be on the verge of failure.
- Vibration During Acceleration: A worn CV joint can cause vibrations that are felt through the steering wheel or the entire vehicle, especially during acceleration.
- Grease Leakage: CV joints are protected by rubber boots filled with grease. If these boots are damaged or cracked, grease can leak out, leading to joint wear and eventual failure.
- Clunking Noises: Clunking or knocking noises, particularly when shifting from reverse to drive, can indicate a worn CV joint or a damaged drive shaft.
- Loss of Power: In severe cases, a failing CV joint can result in a loss of power to the wheels, making it difficult or impossible to drive the vehicle.
Maintenance and Replacement
Regular maintenance and timely replacement of CV joints are crucial for ensuring optimal drivetrain performance and preventing costly repairs. Here are the steps to follow:
- Regular Inspection: Periodically inspect the CV joint boots for signs of damage or grease leakage. Cracks, tears, or missing clamps indicate that the boot needs replacement.
- Listen for Noises: Pay attention to any unusual noises when turning or accelerating. Clicking, popping, or clunking sounds often indicate a worn CV joint.
- Check for Vibration: Monitor the vehicle for any unusual vibrations, particularly during acceleration. This can be a sign of a failing CV joint.
- Replace Damaged Boots: If the CV joint boots are damaged, replace them immediately to prevent dirt and moisture from entering the joint and causing further damage.
- Replace Worn CV Joints: If a CV joint is worn or failing, replace it as soon as possible to avoid further damage to the drivetrain.
Replacement Procedure
- Prepare the Vehicle: Park the vehicle on a level surface, engage the parking brake, and use a jack to lift the front or rear end, depending on which CV joint needs replacement. Secure the vehicle with jack stands.
- Remove the Wheel: Use a lug wrench to remove the wheel nuts and take off the wheel.
- Remove the Axle Nut: Use a socket and breaker bar to remove the axle nut securing the CV joint to the hub assembly.
- Disconnect the Suspension: Depending on the vehicle, you may need to disconnect the lower ball joint, control arm, or other suspension components to free the drive shaft.
- Remove the CV Axle: Carefully pull the CV axle out of the hub assembly and transmission or differential. Be cautious not to damage the splines or seals.
- Install the New CV Axle: Insert the new CV axle into the transmission or differential, ensuring it is fully seated. Then, guide the other end into the hub assembly.
- Reconnect the Suspension: Reattach any suspension components that were disconnected during removal.
- Install the Axle Nut: Secure the new CV axle with the axle nut and torque it to the manufacturer’s specifications.
- Reinstall the Wheel: Place the wheel back on the hub and tighten the lug nuts in a star pattern to the manufacturer’s specifications.
- Test Drive: Lower the vehicle and take it for a test drive to ensure the new CV joint is functioning correctly. Listen for any unusual noises and check for smooth operation.
Common Issues and Troubleshooting
- Boot Damage: The most common issue with CV joints is boot damage. Regularly inspect and replace damaged boots to prevent dirt and moisture from entering the joint and causing wear.
- Incorrect Installation: Improper installation of CV joints can lead to poor performance and potential damage. Follow the manufacturer’s instructions carefully and ensure all connections are secure.
- Using the Wrong Parts: Using incorrect or incompatible CV joints can compromise drivetrain performance and safety. Always use parts specified for your vehicle’s make and model.
- Ignoring Maintenance: Failing to regularly inspect and replace worn CV joints can lead to more severe drivetrain damage and costly repairs. Adhere to the recommended maintenance schedule.
- Low-Quality Parts: Using low-quality or counterfeit CV joints can result in poor performance and reduced durability. Invest in high-quality parts from reputable manufacturers.
Follow us on Facebook for more parts.


