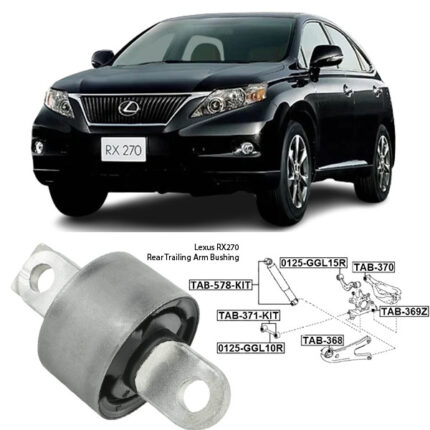


Get Lexus RX450 Rear Trailing Arm Bushing TAB-370 in Kenya
Trailing arm bushings are critical components of a vehicle’s rear suspension system, providing stability and ensuring smooth handling. These bushings serve as the connection points between the trailing arm and the vehicle’s frame, allowing for controlled movement and reducing vibrations. This detailed overview will cover the function, types, materials, signs of wear, and replacement process of trailing arm bushings.
Function of Trailing Arm Bushings
Trailing arm bushings perform several key functions within the suspension system:
- Reduce Vibrations and Noise: These bushings absorb shocks and vibrations from the road, minimizing noise and ensuring a comfortable ride.
- Maintain Wheel Alignment: They help maintain the correct alignment of the rear wheels, which is crucial for safe driving and even tire wear.
- Allow Controlled Movement: Trailing arm bushings permit the trailing arm to pivot, allowing the wheels to move up and down over bumps and dips without compromising the stability of the vehicle.
- Improve Handling: By providing a stable connection between the trailing arm and the vehicle’s frame, these bushings enhance the vehicle’s handling and overall stability.
Types of Trailing Arm Bushings
Trailing arm bushings come in various types, each suited for different applications and driving conditions:
- Rubber Bushings: These are the most common type, offering excellent vibration dampening and a smooth ride. They are typically used in standard passenger vehicles.
- Polyurethane Bushings: Known for their durability and resistance to wear, polyurethane bushings provide a firmer and more responsive feel compared to rubber bushings. They are often used in high-performance and off-road vehicles.
- Solid Bushings: Made from materials like metal or high-density plastics, solid bushings offer minimal flex and maximum rigidity. They are used in racing and high-performance applications where precise handling is required.
Materials Used in Trailing Arm Bushings
The materials used in trailing arm bushings significantly impact their performance and durability:
- Natural Rubber: Offers excellent vibration dampening properties and is cost-effective. However, it can degrade over time due to exposure to heat, oil, and other environmental factors.
- Synthetic Rubber: Compounds such as neoprene or nitrile provide improved resistance to heat, oil, and chemicals, extending the lifespan of the bushings.
- Polyurethane: A synthetic material known for its durability and resistance to wear and tear. Polyurethane bushings offer a firmer feel and are available in various durometers (hardness levels) to suit different driving preferences.
- Metal: Metal bushings, typically made from steel or aluminum, provide maximum rigidity and precision. They are used in applications requiring minimal flex and maximum responsiveness.
Signs of Worn Trailing Arm Bushings
Recognizing the signs of worn or damaged trailing arm bushings is crucial for timely maintenance and repair:
- Clunking or Knocking Noises: A worn bushing can create clunking or knocking noises when driving over bumps or rough roads. These noises result from excessive play in the trailing arm due to the degraded bushing.
- Uneven Tire Wear: Worn bushings can cause misalignment of the rear wheels, leading to uneven tire wear. Inspecting tire tread for irregular wear patterns can help identify suspension issues.
- Poor Handling and Stability: Degraded bushings can negatively impact vehicle handling, resulting in a loose or unstable feel, especially during cornering or at higher speeds.
- Excessive Vibration: Worn bushings fail to dampen vibrations effectively, leading to increased vibration felt in the vehicle.
- Steering Wander: If the trailing arm bushings are worn, the vehicle may exhibit steering wander or drift, requiring constant correction to maintain a straight path.
- Visible Damage: During a visual inspection, worn bushings may appear cracked, split, or excessively worn. Any visible damage warrants replacement to maintain proper suspension function.
Replacement Process for Trailing Arm Bushings
Replacing trailing arm bushings involves several steps and requires some mechanical skill and tools. Here is a detailed step-by-step guide:
Tools and Materials Needed
- New trailing arm bushings
- Jack and jack stands
- Socket set and wrenches
- Hammer and punch
- Torque wrench
- Press or bushing removal tool (if needed)
- Lubricant
- Brake cleaner
- Rags or paper towels
Replacement Steps
- Safety First: Park the vehicle on a flat surface, engage the parking brake, and use jack stands to secure the vehicle. Ensure you have all necessary safety gear, such as gloves and safety glasses.
- Raise the Vehicle: Use a jack to lift the vehicle and secure it with jack stands. Ensure the vehicle is stable before starting work.
- Remove the Trailing Arm: Depending on the vehicle, you may need to remove additional components like the rear wheels, brakes, or other suspension parts to access the trailing arm. Use a socket set and wrenches to unbolt the trailing arm from the vehicle frame and axle.
- Remove the Old Bushings: Using a press or bushing removal tool, carefully press out the old bushings from the trailing arm. If a press is not available, a hammer and punch can be used, but take care not to damage the trailing arm.
- Clean the Trailing Arm: Use brake cleaner and a rag to clean the trailing arm, removing any dirt, grease, and debris. Ensure the bushing seating area is clean and free of damage.
- Install the New Bushings: Apply a small amount of lubricant to the new bushings to ease installation. Use a press or suitable tool to press the new bushings into place evenly. Ensure they are seated correctly without distortion.
- Reinstall the Trailing Arm: Reattach the trailing arm to the vehicle, ensuring all bolts and components are torqued to the manufacturer’s specifications.
- Check Alignment: After replacing the bushings, it’s advisable to have the vehicle’s alignment checked and adjusted if necessary. Proper alignment is crucial for optimal handling, tire wear, and overall suspension performance.
Final Steps
- Lower the Vehicle: Carefully lower the vehicle from the jack stands using the jack.
- Test Drive: After completing the installation, take the vehicle for a test drive to ensure everything is functioning correctly. Listen for any unusual noises and check for proper handling.
Maintenance Tips for Trailing Arm Bushings
To extend the lifespan of your trailing arm bushings and ensure optimal performance:
- Regular Inspections: Periodically inspect the trailing arm bushings for signs of wear, damage, or deterioration. Pay attention to unusual noises, handling issues, and tire wear patterns that may indicate bushing problems.
- Proper Lubrication: Ensure the bushings are adequately lubricated. Some bushings, especially polyurethane types, may require periodic lubrication to reduce friction and prevent squeaking.
- Avoid Overloading: Do not exceed the vehicle’s recommended load capacity, as overloading can put excessive stress on the bushings.
- Monitor Tire Pressure: Maintain proper tire pressure to reduce stress on the suspension components and ensure even tire wear.
- Address Issues Promptly: If you notice any symptoms of failing bushings, address them promptly to prevent further damage and costly repairs.
Follow us on Facebook for more parts.
